|
Year 2023
Mazda
The Mazda is running well with the new engine. I've
driven about 500 miles without any problems. As most
know, lugging an engine is especially hard on it
during the first few hundreds of miles. (Of course,
it's never a good thing to do, but is really bad during the
break-in period.)
Putting that into practice has allowed
me to "feel" the thicker engine oil. I used to be able to
coast or use light throttle at 30 mph in top gear
(overdrive ratio of 0.775/1). No more, the engine will
lug.
Fuel economy has dropped a few miles-per-gallon
(MPG). It's worth having 60 psi of oil pressure while
cruising. Hot idling oil pressure is in the 20s. It'll be
interesting to see what the oil pressure is during the
summer running the air conditioning and elevated
ambient heat.
Winter Tasks
With the onset of the cold weather, I've transitioned to
my winter tasks. It's good to be able to knock them off
my list. They stack up during the summer.
For instance, John had given me a Salamander heater
that stopped working for him. He was surprised because
it had only fifty hours on it, at most. Since he isn't blessed
with my spare time, he purchased another unit and gave
me the malfunctioning one.
These torpedo-shaped heaters are fired by kerosene.
When energized with a 110-Volt
supply, Salamander heaters can quickly
generate a lot of heat for, say, a construction work site.
While it would be overkill, and even dangerous, inside
the Power Cellar, I'll, no doubt, find another use for it.
I performed the servicing per the manual, which
John also gave me. That was a pain the a$$. Here's
an example. To access the fuel filter, the heater must
be partially disassembled! The manual requires that
the filter is checked every time. Yeah, so who's going to
do that except when the thing fails?
After cursing my way through the manual's service
schedule, I found no faults. The problem was a simple
thing. The kerosene pump was locked. I simply spun
the fan attached to the pump by hand, and the thing
fired up. It sounds like a little jet engine when running.
Oh, what fun!
Next on the list is to repair my 3-4K Watt dual fuel generator.
I only burned LPG--or as is popular: propane--in it so
the crankcase should be clean. I have a feeling that
the piston rings wore down the cylinder such that there's
insufficient compression to run. A replacement piston
with slightly larger rings would allow for the wear. I'll
have to measure components.
The cool thing is that all the parts are available for this
particular generator. And I'm not referring to switches,
sensors, and pull cords. The piston with rings, crankshaft,
conrod, and
complete cylinder head with valves are all available.
The spare parts are also pretty inexpensive. Those four
parts would only cost a couple hundred dollars. Sure,
a new generator only costs--or used to only cost--about
$400. But it's good to repair machines instead of recycling
them. I look forward to the disassembly. I'll post photos.
Site Updates
I've added three films to the
GRS database.
Also, I added one quote:
...it is possible to commit no mistakes and still lose. That
is not a weakness. That is life.
Captain Jean-Luc Picard
in
Star Trek: The Next Generation
Thursday, final day of November 2023
Power Cellar
Since my last post, I've continued to backfill around the
cellar. It is as well covered I can do without adding
more fill around the base of the sand. I'll use less
expensive fill, as it doesn't need to drain as well.
Inside the cellar, I still had room with the tool shelves
so I
purchased metal bookcases. My books are now all in
one place instead of scattered. It's very
convenient! Here is
a shot of the cellar
from the bulkhead side. And here's
a photo
of the eastern wall.
The "big top" is now down. Also, I temporarily installed
plywood and insulation over the bulkhead opening.
Next year, we'll build the wooden bulkhead, install
the fresh-air vents, and complete the backfilling.
The structure sure has come a long ways this year.
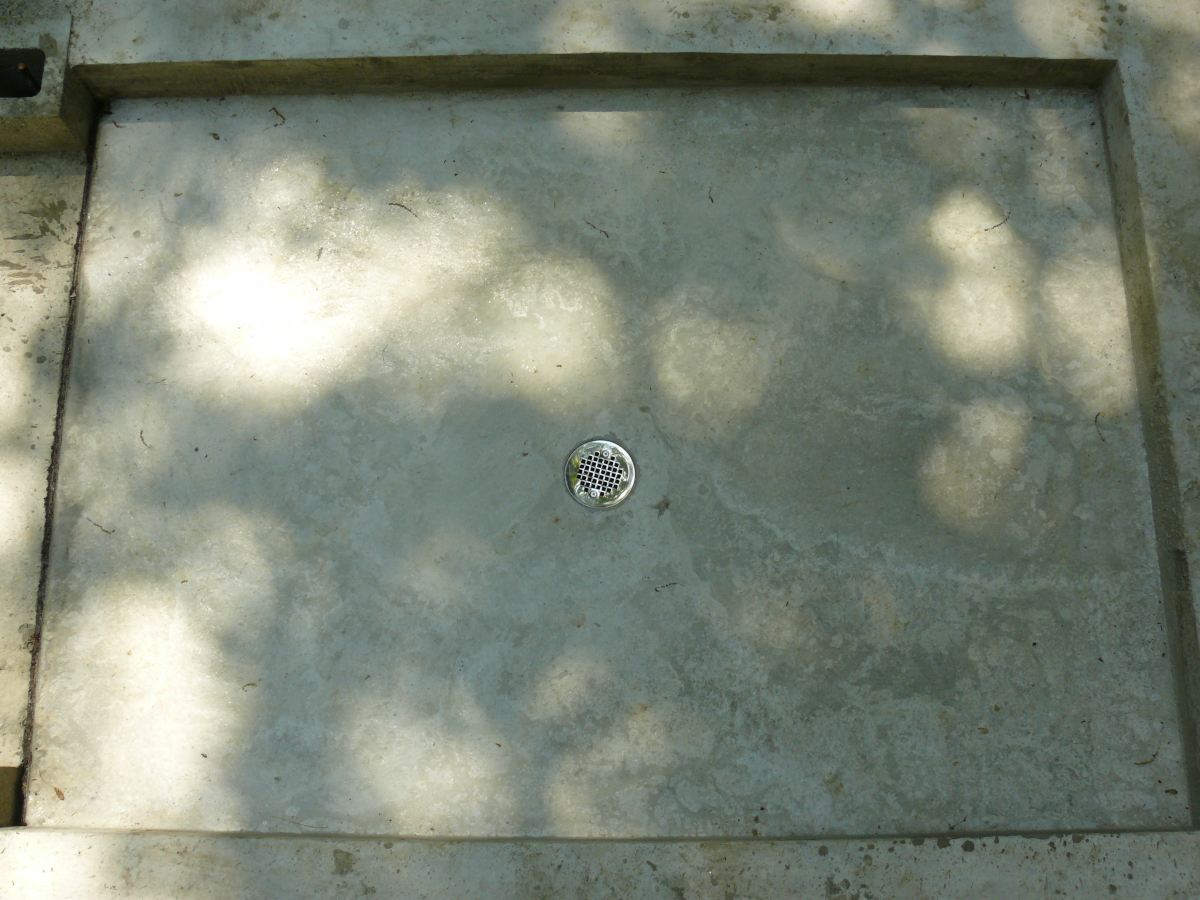
We started this year by pouring
the bulkhead floor.
Site Updates
I've added 15 films and one TV program to the
GRS database.
Also, I added one quote:
Confidence is faith in oneself. It can't easily be given by another.
Counselor Troi in Star Trek: The Next Generation
Wednesday, 8th of November
New Radio
The new radio is wonderful! It's surprising how much I
depended on listening to the radio. Sure, the reception
is still poor; however, now speakers don't cut in and out.
The DVD player is awesome combined with the in-roof
speakers! Well worth the expense!
Power Cellar
With the roof insulation in place, John and I installed the
stairs. He told me that normally three stair stringers are
employed. Stringers are the oddly cut wooden pieces
that support the horizontal steps from the ground to a place
above ground. He understood why I only chose two
stringers for this particular situation. I'll explain shortly.
I've constructed shelves--two new units and relocated
a pair from
the soft garage--in the cellar. I moved enough from the
garage to allow me access to a single shelf which
holds tools like the chainsaws. Also, I was able to bring
into the garage all the gardening tools. It's excellent
having my tools in a place where the mice have less
access. I'm installing sticky pads in the vents, in the cellar,
and near
the bulkhead to stop any mouse that dares.
(Please,
don't attempt to lecture me on the virtues of mice,
because they have NONE! They have ruined a lot my
property, and I don't speak alone. Mice are worse than
squirrels, and I never swerve to avoid squirrels in the
roadway. If one of the bushy tail bastards is in my way,
then I take him out! Squirrels rip up houses and tear
up decorations. I hate them!)
How's that for a parenthetical rant!

The stairs worked out quite well. Yes, I should have
skipped the final course of concrete blocks on the
bulkhead; but, it's OK because I can bury that area
even more without worry. (Recall that the block
walls are filled with concrete and rebar.)
I apologize for the leaves and plywood/tarp covering.
The wind was gusting something fierce today. Here
are "The--err--7 Steps" in living color:
here.
The keen eyed will notice the "extra" supports for
the right stringer. Yes, we made a mistake. We drilled
in two "L" brackets before noticing that they were
misaligned. Like I told John, I'll use them as hangers.
Don't understand how I can use the extra hangers? Well,
I had a thought. "Wait. Yeah. I have an idea." (or something
like that from a cult classic film!)
See what I mean
here.
Yes, most steps can be removed to allow access to the
"hangers" and drain. Also, I'll be able to store items
that don't mind being wet. I only showed one step
removed in that photo. The three steps above it
remove in the same manner.
It's not very hard to make removable stairs. For each
step, I drilled one
side of the step and that stringer. Next, I carefully
drilled a clearance hole in just the step. Then, I lightly
hammered in a rebar cut to the specific length so I
could drill the other side and stringer and clearance
hole. After both rebars were lightly in place, I
hammered them home with the step in place. Finally,
I hammered the rebars such that they are below the
step. (I removed the step first.) Phew, that took longer
to write than to do!
I'm in the process of staining the holes for the rebars.
That's why the photos may show a glossy stream on
them!
Thanks for visiting, Bill's Universe!
Power Cellar
I cut rigid-foam insulation and added caulking to fill
the small triangular pockets in the eastern & western eaves.
I hate to have any pocket underground where water could
possibly collect, even in sand. The insulation also will
prevent some
heat from escaping from the cellar. Then, I sealed the
roof insulation to the plywood, as needed. Here's
a shot.
With the floor and walls completed, I insulated the
eaves with pink insulation, which, if the packaging is
correct, is as soft as cotton. Of course, during the job
I wore an industrial face mask, gloves, and glasses. I
like cotton
The job was accomplished a lot quicker than I
expected. I custom-cut all the pieces. The closest width
that I could find was
cut-at-the-factory for 16" on-center beams. So that
means that I had to cut both dimensions. It's definitely
worth it to have rafters 12" on-center, though!
I'm very happy with how it worked out. See one eave
here
and another eave
here.
It's definitely warmer in the cellar with all the insulation.
I spent a couple of days moving belongings into the
cellar this week. I'm happy with how much the cellar holds.
Of course, it was built to contain batteries. I've left room
for them.
The time for building is coming to a close for 2023. Wow, that
year is impressive to me! We really should have a moonbase and
flying cars. Oh wait, the moon's not made of cheese, and
people are typically too stupid to navigate two dimensions
without crashing! Still, 2023-wow!
I have another task to complete on the cellar before
packing it for the winter. Till then, I'll continue to move
stuff into the cellar. Stay tuned!
New Radio!
The head unit that came with the camper had always
given me some trouble. Buttons wore out and needed
to be pressed hard. A speaker would disconnect. I had
replaced all the speaker wires with heavily insulated
wire pairs.
When a speaker would cut out randomly and it wasn't
the fault of the speaker--which is new--, I gave in. I had
to replace the radio. It had
served well. Who remembers Panasonic Power Tuners?
Yeah, I'm old-school or just tight-fisted!
Like most folks, I wanted to improve what I had. Since,
I've had good luck with the Jensen radio in my Mazda
and, well, they're about the only company producing
radios with disc readers--you see what I mean by old?--I
purchased another Jensen for the camper.
It required a double-DIN hole so I enlarged the cutout.
Impressively, the radios have settled on a color code
for the speaker wires. I only had to install new wire
terminals. Yes, Stuart, wire nuts don't cut it for speaker
wires. The ideal
way is to solder the wires together. Unlike Mike, I don't
have the patience! Maybe one day: I only hope to aspire
to his level!
Also, I had replaced the antenna to receive more
stations. Ha, that was such a dream! The new radio
picks up the same stations with similar quality. Oh
well, it was worth a try!
The new radio can play DVDs, which is really cool.
I can walk around and the film more or less follows
me. What a luxury compared to having to sit in front
of the computer to really hear things! Yes, I love
seemingly simple things. A bunch of small improvements
do make life better! Life could be a lot worse!
Enough of me rambling: here's the new radio
installed.
It's playing one of my favorite films. Here's a shot of
the
screen.
Guess the film and I have something for you!
The radio really brightens the interior of the camper.
(Even with the skylights, it can be dark in here!)
I need to learn to use the touchscreen, but I like it.
This radio is so choice!
Thanks for reading!
Power Cellar
The dance floor is now closed! I applied two layers of
asphalt sealant on the plywood and the pressure treated
2x8s. Well, that's after I sealed any seams with caulking.
Yesterday, John and I "glued" down 2-inch rigid foam
insulation to the roof. We also secured them with "L"
brackets and then sealed the insulation with asphalt.
These tasks represent a monumental achievement. I
never intended to fully install the roof insulation this year.
Fortune would have it that I was given three days of
dry, 70 degrees. That's worth so much at this point in
time of the project and at this time of the year. Indian
Summer is a wonderful thing!
To make it harder for water to leak through the roof,
we staggered the seams of insulation so they didn't
align with the seams of the plywood. Sure, it may seem
obvious to you reading this report but in the real world
with the pressures of time against you, it's not so
obvious! But we figured it out soon enough.
Also, we
gooped up--technical term--the seams
in the insulation. See what I mean
here.
I'll need to touch-up the asphalt
sealant in the spring but it's waterproof. The seams
between the insulation will need a second "gooping"
to eliminate any valleys where water would stand.
The "L" brackets do a good job. See
here.
Overall, it worked out well. Of course,
the ubiquitous leaves found the fresh sealant. They'll
become fertilizer for the future living
roof, as John so eloquently put it. Anywhere I smeared
caulking, the asphalt sealant will not adhere. That's why
the sealant looks incomplete, as you can see
here.
I plugged the vent holes with rigid-foam to allow me the
opportunity to finish the cellar floor. Thanks to the warm
temperatures I finished the floor and touched up the walls.
And if I may be so bold, the floor looks great. What do you
think?
It has come a long way from where it was when we uncovered
it
this past May!
Sure, the paint chips aren't perfectly distributed. The
distribution reminds me a bit of the universe. Well, my universe
on the cellar floor is spread out more evenly than the real
universe! Where else would you read such a statement?
I sealed the holes in the bottoms of the safes with RTV silicone.
As of today, they have not leaked. We've got a "cold rain" in
the forecast for tomorrow. Now that the roof is sealed and the
bulkhead is covered, any water that appears in either of the safes
will be from underneath, so I'll know where to act.
Always Adventure
We got a little rain today, which showed that my repair job on
the camper's roof wasn't good enough. During the warm
temperatures I had replaced the radio
antenna, which of course meant cutting into the roof. I learned
something: don't cut into the roof in the autumn. Do it in the
spring! Oh well. I have some leftover, new thick plastic
underlayment that I cut to cover the front third of the roof.
It directs rainwater away from the weak area. I'll repair the roof
in the spring. The good thing about winter is that snow doesn't
leak. I'll just ensure that the roof is clear before the thaw.
Not to be left out the hot water connection to a sink broke.
Fortunately, I had a replacement part and tools inside and
effected the repair. The good news is twofold: one the leak is
gone and two the water pump no longer cycles periodically
when I'm not using any water. So, I call it a success. Until the
next challenge!
Site Updates
I've added seven films to the
GRS database.
Enjoy!
Power Cellar
The roof is now on the Power Cellar. John calls it the
tap-dance floor because of the reverberating sound
that it emits
when walked upon. It's super sturdy. An elephant
could tap dance on it. Take a look
here.
We cut the big top pole and left it on the dance floor.
Today, the pole blew down so I reinforced the base with
two concrete blocks and a stone.
With the roof in place, I could now paint the main floor.
Leaves, pine needles, and other autumnal debris
were blowing in before now. I began by "catching up"
the spot where the big top pole had resided. Since I
was unable to etch the concrete with the pole in
position, I applied three
coats of concrete sealant today. I'll apply two or more
coats of epoxy floor sealant tomorrow. Then, it'll
be caught up to the rest of the cellar floor. If you
want to see the spot with three coats of sealant, click
here.
I put the sealant on thickly because I had plenty in
the can. That
explains the patterns that can be seen. Also, in the
cellar are the stained bits for the future bulkhead steps.
That
will be the task for Saturday. Currently, the bulkhead
area is covered on the outside by a blue tarp, so you
can orient yourself. The bulkhead area is in the top right
corner of "the spot" photo.
The can of Epoxy-Seal is anxiously waiting in the wings.
Tomorrow will be its turn to be used. Hopefully, I can use
it entirely on "the spot". I won't store a little bit of epoxy
paint. So if I don't use it, I'll paint one of the stones in my
woods.
The in-ground safes--the holes in the upper left of the
photo--were wet with standing water. I don't know if
the moisture came in during rains before the dance floor
was put on, or if it is seeping up through the pushed-in
rubber plugs
in the bottoms of the safe. The bottoms have two holes
each so that the safes may be screwed down from the
inside. This feature is an annoyance
in my situation; however, at worst I'll seal the holes with
something durable.
Oh, I have moved the ladder to the bulkhead. It's difficult
to climb through a 1/2" plywood roof!
Milepost
Unfortunately, the upright for
the milepost
rotted and collapsed. That'll teach me to use a tree
trunk. I'll
replace the upright and realign the signs. No more
untreated lumber for the future uprights! You know
that this won't be last time that I repair the milepost
Thanks for visiting!
Mazda
The Mazda is now running without any unusual noises.
Yay! It's great having it back. I can almost park diagonally
without crossing the lines marking a spot. What a difference
when compared to the Dually, which usually occupies
two spots to allow for its length!
Power Cellar
We did indeed install
the cross-braces
for the rafters. The rafters will now work together to arrest
twisting and distribute the weight on them. Really, they
make the roof strong enough to drive the Kubota on it!
Not that I would do such a thing.
I snagged a line of the "small top" with the tractor's bucket.
I decided to take it down and just use a piece of plywood
and a tarp to cover the bulkhead. Frankly, I'm glad that
it's gone. The lines and post were a tripping hazard now
that I've backfilled the cellar! Maybe you noticed the higher
ground?
All the interior walls are completely sealed. It took many
coats. Far more than quoted on the cans. (Did you know
that many paint cans are now plastic?)
Also, I was able to coat the floor in the bulkhead. I used
paint chips to break up the white and hide irregularities.
I think it worked out very well. What do you
think?
Much better than
the unsealed concrete.
With the bulkhead drying, and now looking decent, I've
been using a ladder to access the cellar. It's a tight
squeeze between the 12 inch on-center rafters.
Inside,
it is becoming darker. I purchased a headlamp so that I
could see imperfections and paint them in the reduced
ambient light. That is a great
idea that I borrowed from Mike. Thanks, Mike!
John and I installed the horizontal eave plates. They're
thicker than
they need to be, but we had the pressure-treated 2x8s.
Of course, nothing ever matches up perfectly. The new
eave plates didn't line up with the vertical 2x8s that
create the "box" for the roof system. The quickest solution
was to use the chainsaw to trim the horizontal eave plates.
They're going to be buried so who cares what they look
like! Here's the section that I trimmed along the
northern eave.
It worked out quite well. I've been sealing the joints with
30-minute rain-ready silicone caulking. The rains seem to
have subsided, but I don't trust the weather!
Site Updates
I've added 18 films and three TV programs to the
GRS database,
which includes a new favorite.
Also, I added three quotes:
I need you, Lovejoy. Since my wife died, I need someone to hate.
Lovejoy
Do you have any hobbies?
I collect spores, molds, and fungus.
Ghostbusters
How can you sleep at a time like this?
The Old Father wound the skeane of your life a long time ago. Go and hide in a hole if you wish. But you won't live one instant longer. Your fate is fixed. Fear profits man nothing.
The 13th Warrior
I apologize for my delinquency. Enjoy!
Mazda
The belt tensioner was failing; however, it was not the
reason why the idler pulley was rattling. It turned out
that the idler pulley itself rattles when spun quickly on
a finger. I didn't notice that before. Doh! An idler
pulley made by Mazda is on order. Then, the car should
be 100%
I've been driving the Dually. It returned 13 mpg
the other day! Yeah, it's kind of lame since the Mazda
will average in the 40s. Then again, the Mazda doesn't
weight three tons standing at the curb. Neither can it
move more than a ton--yes, I've "overloaded" the Dually with
2,400 lbs without flattening the leaf springs!
Power Cellar
The Power Cellar is progressing well. We've installed
the rafters. They're 12 inches on-center, which is probably
overkill. I'd rather not have it ever fall in. Remember
that it will have about 4 inches of soil on top to accomodate
a "living" roof. We will install cross-braces between the
rafters next weekend. But for now, take a look
here.
We decided to use two additional sill plates to raise
the north wall. These provide a rise of 3 inches.
(2x-s are not 2 inches
thick, only 1-1/2 inches.) The rafters are 8 feet long.
That 3 inches of drop over 8 feet. It doesn't sound like
much but it'll do. The roof doesn't need to shed water
during a torrential downpour. The "living roof" and soil
will slow the water, so we need only be concerned with
avoiding "pooling".
I sealed the ends of the roof on both sides. Yes, I know
that I'm not the neatest individual with the caulking gun.
Sometimes "that'll do" is enough! See the sealed eastern
end from
the outside
and
the inside.
The inside photo shows how we attached the wooden
sill plate to the concrete wall. I placed metal straps in
the wet concrete when I filled the walls. Once the
concrete had hardened,
the straps are split and pass through holes drilled into
the sill plates. Flatten these wings with a hammer and
nail them to the sill plate. Presto: that's a good
concrete-wood interface!
I have started to seal and paint the inside of the cellar.
It has been quite the job. I am making headway. I don't
give up; I'm too stupid for that. I think that the walls need
only one more coat after today's work. I will post photos
when I'm happy with the result. Stay tuned! Same Bat
Channel!
Thursday, 28th of September
Delay
Sorry for the delay. I focused on the power cellar and
mending the Mazda the past months.
Mazda
Good news: the Mazda is just about 100% again. I
have a slight rattle from the idler pulley. I believe
that it's caused by a failing belt tensioner. A new one
should arrive soon. Otherwise, it runs very smoothly.
I already have more than 100 miles on the new
engine. Most notable is the action of the clutch. It
grips immediately. I can't tell if there's an increase
in power, as I have yet to use any throttle.
10W40 is my synthetic oil of choice. There aren't
many choices; however, perhaps that will change. I
finished covering all bare spots with POR 15. It's
great having the Mazda back
Power Cellar
I've made a lot of progress since my last post. I last
reported that I'd finished the
half of the fifth course.
Now, all the block work is completed. The walls are
completed full of concrete with rebar (and crushed beer
cans). The outsides of the
walls are coated with asphalt sealant. I've even backfilled
much of the structure with screened sand. I included failed
concrete projects (not mine), the bent bubble level, cured
concrete bags, and other steel trash!
Furthermore,
the sill plates--i.e. wooden 2x8s--have been attached to
the block walls. They will provide the transition from the
concrete to wood. I've settled on a wooden-beamed roof.
John's very comfortable with them, and they are quicker
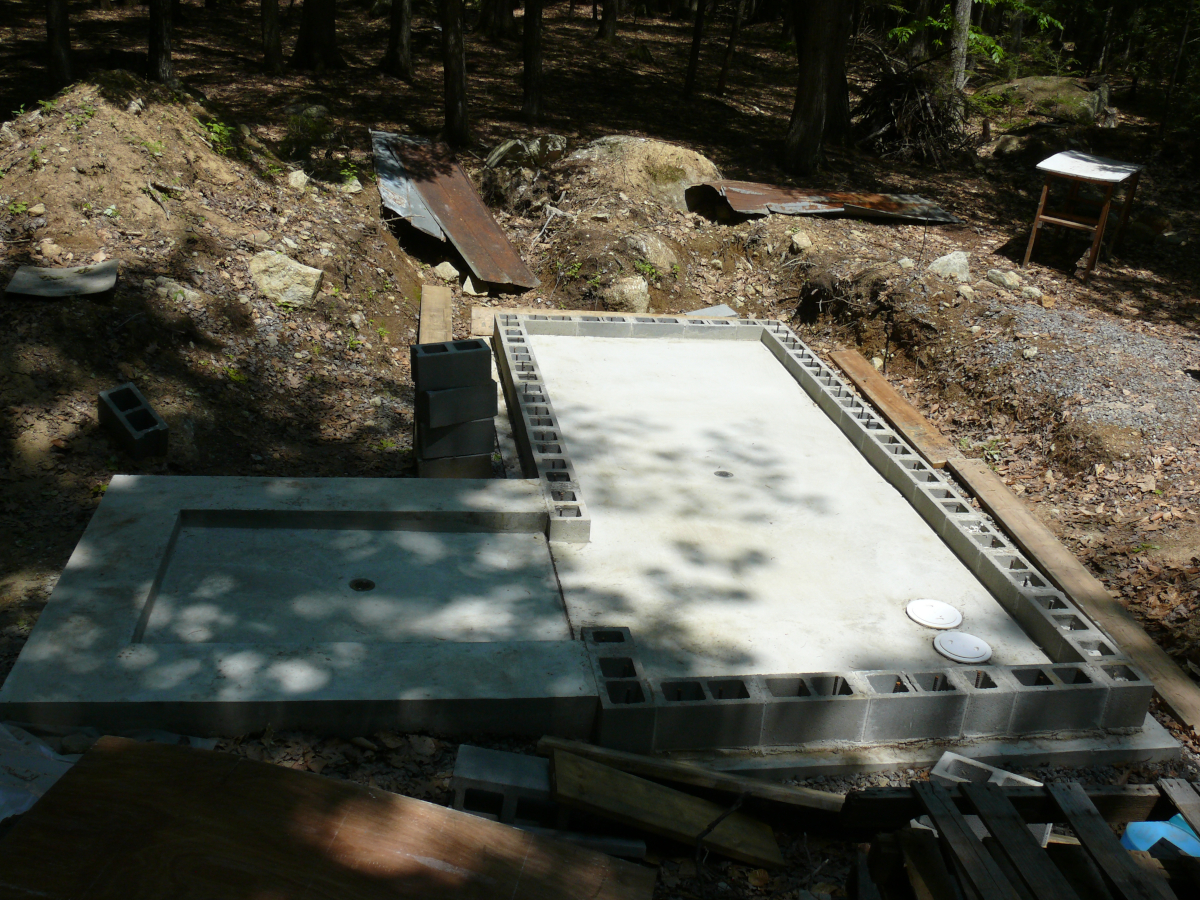
to assemble than a reinforced concrete slab roof.
Here's what the power cellar looks like
right now.
Notice that the ugly trenches are gone. I'll continue to add
backfill to slope up and cover the cellar. Today, I sealed the
floors
against moisture. OK, sure, my drainage is very good but I
want to minimize humidity inside the cellar for obvious
reasons.
Of course, with our humid summers I'll need a way to
ventilate my buried cellar. So I left out three half blocks. Two
will provide a crossflow of outside air--especially with the
help of a duct fan! The other will encourage any hydrogen
gas escaping the lead-acid batteries to leave the cellar.
The battery vent is shown
here.
Next on the list is to paint the floors and seal the walls. I plan
to paint the floors white. I hope to find white sealant for the
cellar walls. Otherwise, the walls will be sealed and grey like
the bulkhead area will be, when finished. After that, we can install
the stairs and the roof. Here's a shot from
inside the cellar.
Looking down from the outside is impressive. The five-year-old
daughter of my neighbor who frequents my property said
"oh, wow" when she looked down. It hadn't been that long ago
since my neighbor told her not to push
staged blocks
off the walls. Little Joyana is an "outdoorsy" girl and
frequently helps me and informs me what she is doing. (In fact,
last year an elderly couple mistook her as my daughter as she
frolicked around my vineyard.)
The more clever reader will notice that the main pole for the
big top is planted on the cellar floor. I've carefully left alone
a rectangle around the pole and its concrete blocks. I'll seal
and paint that small area once the roof is in place.
High winds had knocked down the big tops while I was away.
I will be glad to take them down. The blue tarp has so
many drip holes that it hardly does the job anymore! Even the
main tarp is starting to drip. It's a good thing that John only
intends to cut it into strips to cover firewood piles.
Site Updates
I've added five films to the
GRS database.
More will be forthcoming!
Also, I added two quotes:
...what you're calling hard luck, we made New England, and cod fish
The Devil and Daniel Webster
They're not actually crazy, you know. They're just women
Skins
Enjoy!
Mazda
I've drilled out and "Heli-Coiled" the sheared-off stud.
I'll need to make
the hole in the mating flange slotted, but life could be
worse.
The clutch and pressure plate are both worn. The
flywheel is OK. The oxygen sensors should arrive by
tomorrow at O'Reilly Auto Parts. Fortunately, Mazda
keyed the connectors so I will know where each goes
on the converter/manifold.
It and replacement clutch
parts are on order with the dealership. Fingers crossed
that they don't cancel the order. They have done so in
the past. I was sure to thank both individuals by name
who fulfilled my previous order in the order request form.
With the car on a lift, I have taken the time to paint all
the spots of corrosion with POR 15. The stuff is fantastic
despite its high price. One doesn't have to prepare the
surface, aside from removing flaking rust. It cures quite
quickly in our humid summers.
I painted the entire
bottom half of the engine bay and undercarriage. The
rear undercarriage was
a little worse than I knew. But no holes. I do have small
perforation in front of the rear wheels on the rocker
panels, which I have been addressing with POR. Next,
I'll paint the bottoms of the doors.
I have been taking the time to "POR" brackets on the
engine. They would never fail, but it cleans them up.
I did "POR" an external coolant tube underneath the
manifold. I'd hate to have it fail. All in all, I should have
an almost new car once I get the engine/transaxle
back in place.
Masonry Step-By-Step
I laid another half course of blocks earlier this week.
Now that I'm more comfortable with the process, I
took photos. I'll present them here.
The consistency of the mortar is important. It is
affected by humidity, direct sunlight, moisture in
the blocks. That's why I keep both
a bucket of water
and
some dry mortar mix
ready to go. (The mortar mix in that image was
partially solidified. Chunks are intolerable in
mortar mix, so be sure to check it before you
purchase a bag!) The mortar in
this tub
worked well in my shaded, humid conditions
with dry blocks.
Before starting, you'll need
two bubble levels.
Then, the mortar is applied and the invaluable
spacers are pushed into
it.
The manufacturer of the spacers
recommends only two; however, we've found
that four work much better.
I recommend wearing
gloves to reduce one's exposure to mortar. It is,
like Portland cement, an alkaline mixture and
will cause a chemical burn with prolonged
exposure.
Next step is to "butter" the edge of the block.
The trick is to smush the mortar onto the block
so that it doesn't fall off when lifted into place.
Take a look at
a "buttered" block.
(I apologize for the poor focus. Damn it, Jim.
I'm a block layer not a photographer!)
See how the "buttering" helps make a good
mortar joint on the same course of blocks
here.
Now is the time to check the level of the
individual block in
the long direction
and
the short direction.
I aim to keep the bubble between the two
lines. It probably won't be perfect, but it'll
do.
Before moving on, check the block relative
to its course mates with the long level, as
I'm doing
here
across a few blocks. Vertical alignment
between courses is important, as you can
see
here.
Keeping the course
level
makes the laying of future courses easier.
Keeping the joints between the blocks is
something to keep in mind. I use the long
level to keep my blocks vertically in line by
by using lower courses.
As a visual check, I
sight down the wall from the inside.
Since the outside will be backfilled,
I only care how the inside wall looks. Remember
blocks are not perfectly shaped, so one must
choose what should look straight.
It's always
good to check that mortar has
squeezed out
inside the block. Speaking of it, extra mortar
squeezed out should be collected
and reused. Mortar that is dropped should be
picked up before it solidifies on surfaces that
are important. It saves clean-up work with a
chisel in the future.
The final important step is to point or strike
the mortar joints. Striking seals the mortar joint
and displays good workmanship. In
a poorly focused photo,
half of the joints are struck. (The striked joints
are on the right.) A spoon may used; however,
hardware stores offer an inexpensive steel tool
just for
the purpose.
Worksmanship and patience is the key with
masonry work. I'm, by no means, an expert;
however, I picked it up quickly. Of course, in
the case of the Power Cellar, the block work
needn't be exactly. We'll fill the walls with
concrete, so the blocks are really just acting
as forms.
Here's
the half course
that I assembled earlier this week. It worked out quite
well.
Mazda
I've the engine and transaxle out of the car. That was
tedious work. Every electrical connector is different and
took me time to figure out how to de-mate.
Currently, I have separated the transaxle and need to
move the flywheel, clutch, and pressure plate to the
new engine before reinstalling the transaxle. I will, of
course, check the clutch disc, pressure plate, and flywheel
for wear.
Otherwise, there's only one coolant connection that
needs to be transferred to the new engine. I sheared
a bolt and a stud. I've replaced the former and will
order a Heli-Coil kit to repair the latter.
I've decided that it's prudent to replace the
manifold/catalytic converter now. There's no way to
replace it without extracting the engine. That means
new oxygen sensors. I hope the local retailer sells
the sensors for less money than Mazda. $700 for
two sensors seems a bit excessive.
I've learned a lot about the Mazda during this job.
I've also learned that auto work and masonry work
don't use the same muscles
Power Cellar
The cellar has taken a backseat to the Mazda. Though
John and I completed
the third course.
You may think: I only see two rows of blocks. The reason
is that the bulkhead footing is a course higher than the
cellar footing. I name courses according to the cellar,
not the bulkhead.
We've had some impressive rainfall. It washed out a
road near me, severely eroded road shoulders, and
even secluded some homes. I was very lucky that only
my driveway was slightly washed-out. I have since dug
a drainage ditch to cope with runoff from a nearby hill.
Others weren't so lucky. I saw deep ravines in driveways
as I drove around town. The power cellar was threatened
by the epic rainfall. The water pooled above the footing.
Fortunately, it didn't reach the top of the floor and flood
the cellar! Once I can backfill the walls, it'll be better. Right
now, the hole acts as a basin by collecting all the
surrounding runoff. See the flooding
here.
For your reference, this corner is visible in the lower left
corner in
this photo.
Site Updates
I've added seven films to the
GRS database.
Enjoy!
Power Cellar
I was confident enough to lay blocks by myself. I put
down about half of the fourth course one day last week
and started the fifth course today. The threat of rain
stopped my progress today. See my work
here.
It's not perfect but not bad for a novice. I learned
a lot assembling the fourth row, which I applied to the
fifth row. I'll only do better work in the future!
During the incessant rainstorms, I sanded the bulkhead
floor and first course. See it
here.
Not only is the result aestheticly
pleasing, but it also levels the floor and will make the
walls easier to seal. Yes, we're going to seal the floor and
walls. Don't forget that concrete is porous. Yes, the
floor drain is off-center. And, we like it that way
I haven't sanded the main floor yet. I have sanded
the inside of the walls. We use the three-foot level
to line up the individual course and also make them
look good with their lower companions. Of course,
I need to wait for the mortar of the fifth course to
dry before I can sand it. Here's
a sample section
of the wall.
Masonry work sure is a heavy activity. My body reminds
me that I'm not a twenty-something. Though, I have
been learning to work smartly instead of using brute
force--or what force I can muster! John has shown
me the way to work within one's physical limits.
Since I've been using my mind a bit more, and we're
working for no one but ourselves, free of charge; it
made me think. No one in the town government has
challenged us either. (The "big top" is visible from the
road, and now in Google Maps.) We must be accepted.
Hmm, it sounds like we need to create a secret society.
We could call ourselves Independent Block Builders
or Free Masons...
Mazda
I've finally received the gaskets that I needed. In fact,
I've two sets, because it seemed that one dealership
was going to blow me off. I ordered a set with
overnight shipping from another dealer. Oh, how I
don't like dealing with dealerships!
Tomorrow, I start the engine transplant. I'm going
to follow the Factory Service Manual and take photos
as I go along, so--barring corroded fasteners--I should
be in good shape.
Site Updates
I've added seven films to the
GRS database.
Enjoy!
Trip Page!
It's listed at the top of
the main trip page.
The mobile page is
here. Enjoy!
"Power Cellar"
Since the cellar will house the batteries and all the
electrical control devices, why not give it a cool name
like
Power Cellar? Well, the Power Cellar is coming
along. John and I laid about half of the second and
third courses. I touched up the mortar joints today and
cleaned up the site.
I bought metal spacers that ensure an exact mortar
joint underneath the blocks. It makes life so much
easier. I highly recommend these things. They're
more than worth the $80 that they cost me.
See the current state of the Power Cellar--I like that--
here.
Those with keen eyes will
notice two joints lined up vertically between the
courses. That's a mistake. When we laid the first
course of blocks we didn't do it right. Oops!
It won't
matter, because we'll fill the blocks with concrete
and will run rebars vertically. Once this structure
is backfilled and partially covered with earth, it'll
be practically invulnerable. It would
probably survive a nuclear blast. Not that my small
town is a target!
Mazda
I ordered the engine and related parts on Thursday.
They quickly shipped it from Pennsylvania, and I
picked it up on Friday.
I'm waiting for a gasket to show up. The dealership
is supposed to deliver it when they have it.
The engine was one of only three in the States.
Mazda has ceased production of this engine. That's
OK, as the body will probably be badly corroded by
the time this engine fails.
I've since moved the car into Donna's garage. She
has a lift, which will make the engine swap much
easier. Would you know that the failing engine
started, and I drove it into the bay?! I guess it heard
that I was going to give it a heart transplant and
rewarded me.
Unloading the engine from the Dually was not too
tricky. I backed the trailer, which is drawn by the ATV,
to the tailgate. Then, it was just the patient exercise
of "walking" the palletized engine down and into
the trailer. It went surprisingly smoothly. The only
snag occurred when I accelerated a bit too quickly
and toppled the engine. That was easy enough to
right. Sliding it along the garage floor was a piece
of cake, once I gathered momentum.
"Bailey" & Bailey Circus
The circus is in town! Well, at least, the big top has
shown up. John and I decided to put up a rain shield
so that we may work in anything but a downpour.
It looks like a big top to us. What do you think: click
here.
It works pretty well. We also started the second
course of blocks. They are the first course for the
bulkhead footing, since that footing is higher than
the cellar's footing. Damn you, ledge! It's not all bad
because there's no firmer foundation than one
built on bedrock!
Today, I hammer-drilled the holes for the rebar
"spikes" to integrate the block wall with the bulkhead
footing. Drilling high-strength concrete is never a
fun job for me or the equipment; however, I should
not need to do it again for this job!
I cleaned the floor, because the rain has finally
stopped. The floor isn't perfectly clean but it is
cleaner. The bulkhead footing is "spiked" to the
second course of blocks. Take a look
here.
Since my Gamay grapevines are not waking up
on the top, as they should, and the fences were
ruined by the heavy snowfall; the main purpose
of this cellar will be to house batteries for the
photovoltaic system.
Dually
With the Mazda out of action, I've been driving
the
Dually.
People seem to really like it. I saw it as a tool.
I didn't care for how large and thirsty it is. But,
you know, there's more to it than that.
The ride
is fairly comfortable. Far better than the
Crappage.
The seats are much, much more comfortable.
And it runs smoothly, almost effortlessly, as it glides
down the road. Heck, at 50 mph, the engine is
spinning at only 1,800 RPM!
It did take some adjustment. After all, I'm was a
car driver. I thought in cc's not cubic inches. For
instance, my MG originally was powered by a
67 cubic inch engine. The Dually is fast but lazy
because beneath its hood resides a monstrous
454 cubic inch beast!
It'll be great to take a photo of the two vehicles
side by
side. But until the MG rides again, enjoy a photo
of my first drive in the car by clicking
here.
Two things come to mind. Wow, look at how
young Mike is! It's hard to believe that he's a
homeowner and living a full, adult life. And,
secondly, wow, look at all the
hair that I had! It's not all bad. I save on soap
these days
Cleared Brush
I've caught up to where I was before this past winter.
It looks much better. I've also got quite a bit of brush
to burn during the winter!
Mazda
The Mazda wouldn't start. My suspicion was correct:
engine compression was too low. I performed dry and
wet tests and found that the piston rings or cylinder
bores are leaking.
The compression of three
cylinders were around 80-100 psi. (154 psi is the
minimum.) The other cylinder was still good at 172 psi.
Mike and I blame the 0-20 engine oil.
Mazda sold the
car with that stuff, and I figured that they knew what
they were doing. Nope, the energy-efficient idiots
won. Elsewhere in the world, the car is shipped with
normal oil. Recall that I said that I would increase
viscosity as the oil pressure dropped, because the
Workshop Manual says that I can use thicker oils?
So the solution: it's less expensive to repair the
engine. Also, I couldn't find a new small car being
offered for sale. The 2023 models are so large. I've
already a vast vehicle, and don't need another one!
So either an engine overhaul ($1,800) or a new long block
engine ($3,800) is necessary. I'm going to order a
new engine to save me time.
It's fortunate that it
quit in Donna's driveway and not on the way back
from Mike's place! Also, I'm not working so
it's good timing, if engine failure is ever a good
thing. For this engine, I'm going to run 10-40 oil
Researching the overhaul has slowed my progress
on the trip page; however, it will be forthcoming.
Stay tuned!
Got Light?
While I was staying with Mike, I built a fun addition
for the PV arrays. It worked just like I tested it in
Arizona. The neighbors across the way love it.
I installed "under array" lights! The cool thing is
that they switch on around dusk and run for two
hours before switching off. (I can change the
duration.) They are also powered by
the sun. I did all the wiring and soldering myself
because nothing like what I wanted existed.
Click
here
for a photo or see a movie (6.4 MB)
here.
Site Updates
I've added three films & one TV program to the
GRS database.
Enjoy!
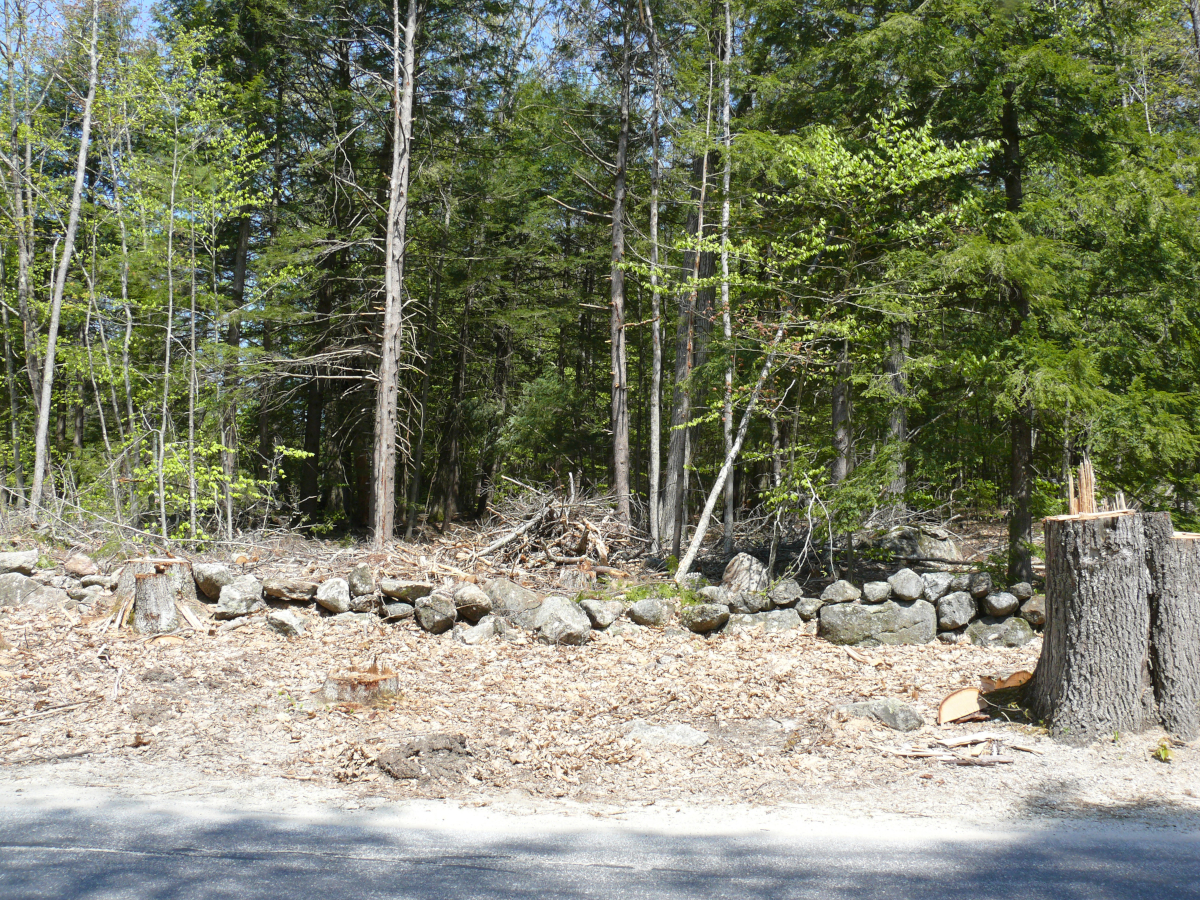
Clearing Brush & Trees
I've cleared the new field of brush. (I will burn the piles
in the winter.) I've one stubborn section of oak that
remains to be cut into a section light enough for
John to haul it away to his wood pile.
Some idiot hammered a bunch of nails into this section.
They're deep, which reminds us that not
all a$$holes are modern. The
tree grew around them. That explains why the wood
wasn't as prized as Dave, my tree guy hoped. Reminder:
do not hammer anything into trees ever!
Otherwise, clearing brush has been time-consuming but
not difficult. The heavy early spring snowstorm did
make a mess. I felled three snapped trees yesterday. The toll
would have been much higher except that I have been
dropping
dead trees for some time now, as regular readers know.
An unproportionate of dead or damaged trees have been
maples. It's really a pity. Maples are such lovely trees.
But they seem to reach a certain height and contract a disease here.
Also, this winter has been hard on them: hemlocks took
out a number of them, by collapsing under the weight of
the last heavy snowfall (32 inches of wet snow).
I'm finally catching up on lot work so that I can tag standing dead
trees for later felling. I think that this practice saved me a lot
more loss. John remarked when I returned that he expected
a lot more downed trees on my lot.
New Growth!
When confronted with such destruction, I reacted as one should:
I planted new life! Even nature responded! Winter may
have broken the back of several trees, but others are springing
up in their stead. Ground life continues to thrive. Also, the
Lady Slippers are back and in greater numbers! Take a look:
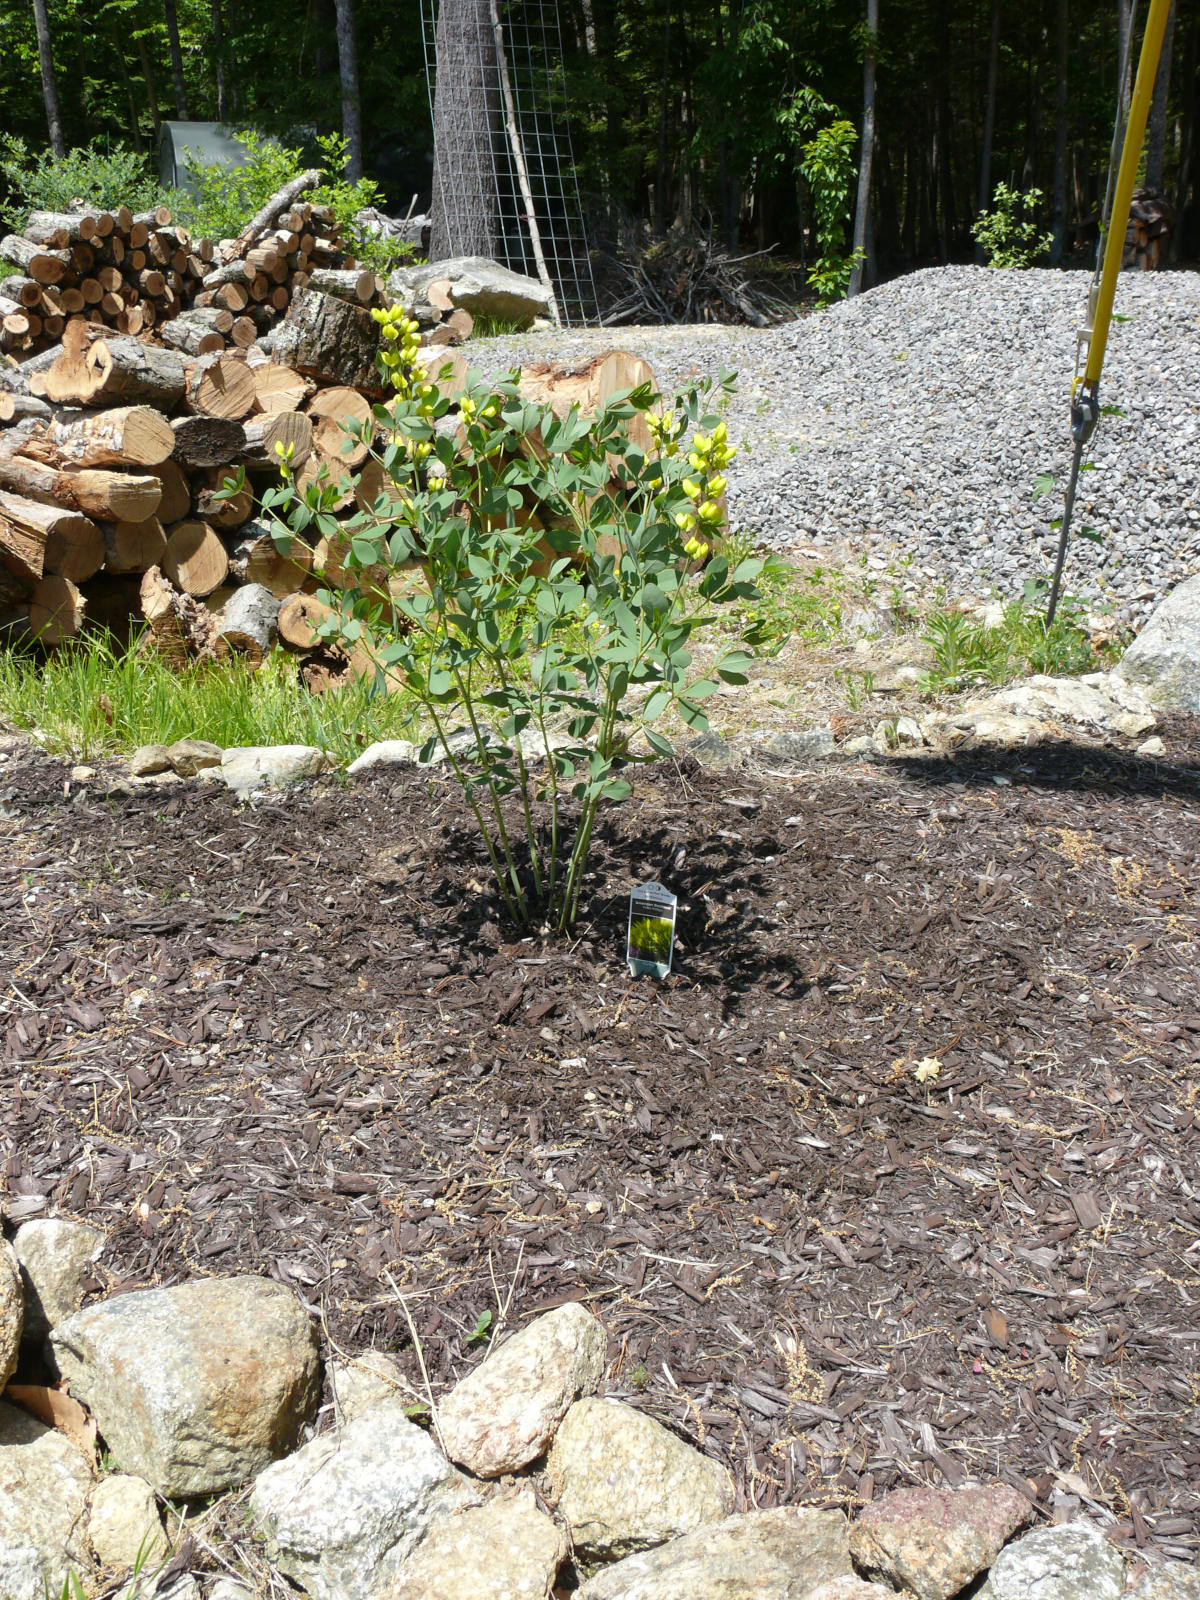
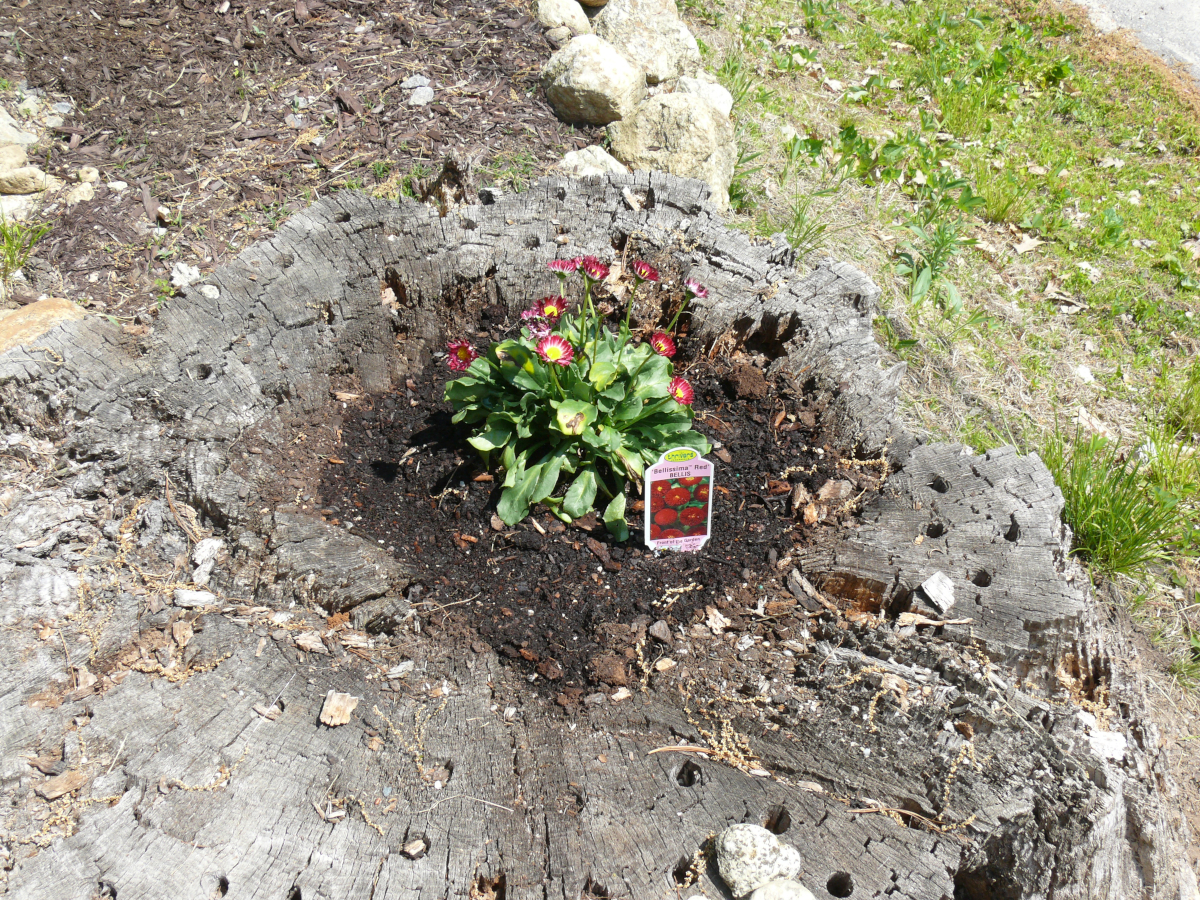
I planted Bellis in two locations on either side of the driveway in
the tree stump planters. They're perennial, and I hope that they
thrive there. The resident bumblebees like the American Goldfinch,
the yellow-flowered perennial. See one
here.
Bees
Writing of bees reminds me that the honey that I extracted from
the failed hive has not fermented. I did spin the extractor too
quickly and, as such, created a slight foam on the top of bottled
honey. Still, the honey is good. I've learned a lot from my first
extraction.
Cellar
The work on the cellar was paused by the threat of rain. We did
manage to pour the bulkhead floor. It worked out well:
Mazda
The new CV axle, which I installed, is working well. It's no longer
a problem. Another problem has appeared. My investigation continues.
I'll keep you posted.
Site Updates
I've added five films & one TV program to the
GRS database.
Enjoy!
Return Trip
I took the scenic route back to New Hampshire and will
document it in a trip page soon! The Mazda's oil pressure
never dropped below 21 psi.
Unfortunately, a CV axle
that the mechanic replaced 10K miles ago developed a
nasty vibration. I have Genuine Mazda replacements on
order. Mike and I replaced the other side with an O'Reillys
axle, so I figure that it will fail in a few thousand miles. I
want to be ready to swap it as soon as it vibrates.
Also, when I entered Missouri the magnetically-coupled
clutch for the A/C compressor failed. It did last 177K miles.
I'll see if I can replace just it with a Mazda part later this
summer. I still need to replace the compressor on the
Dually.
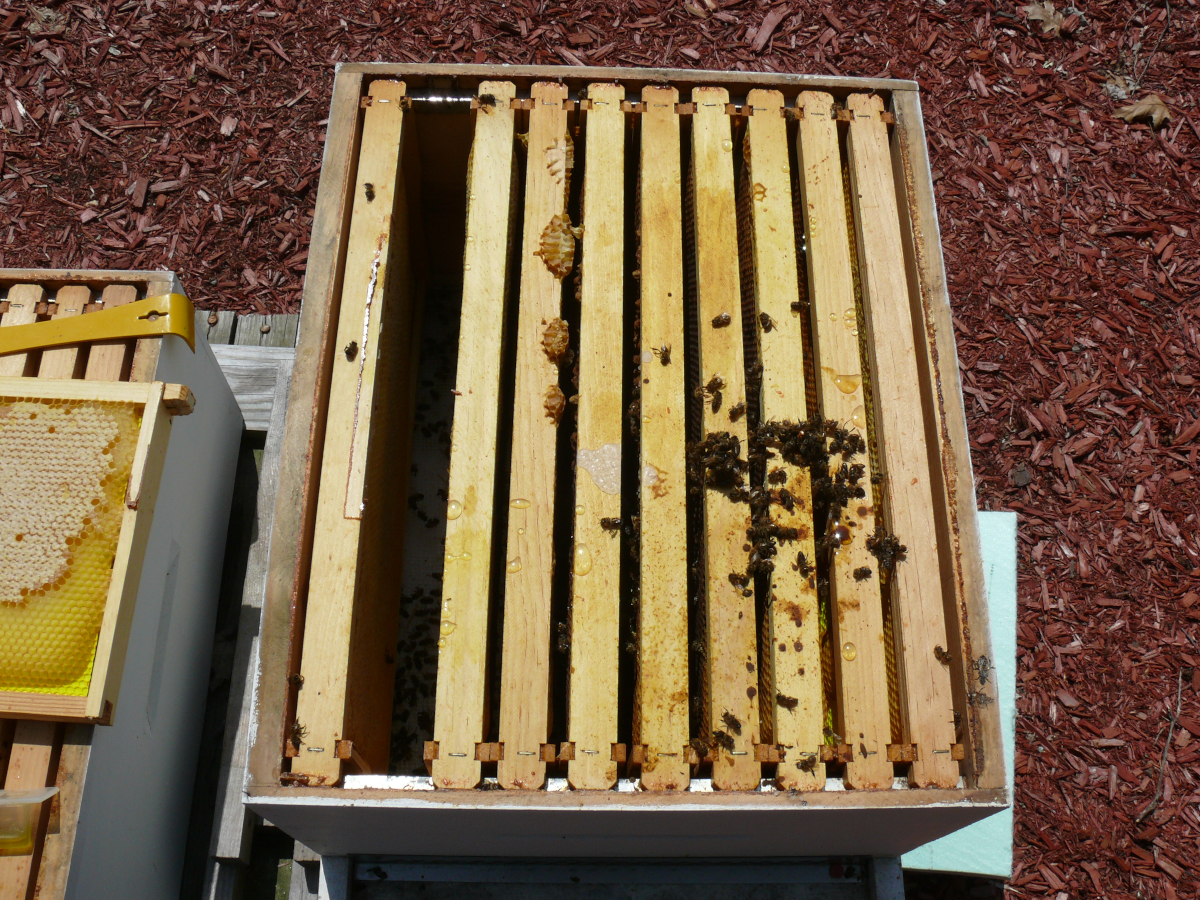
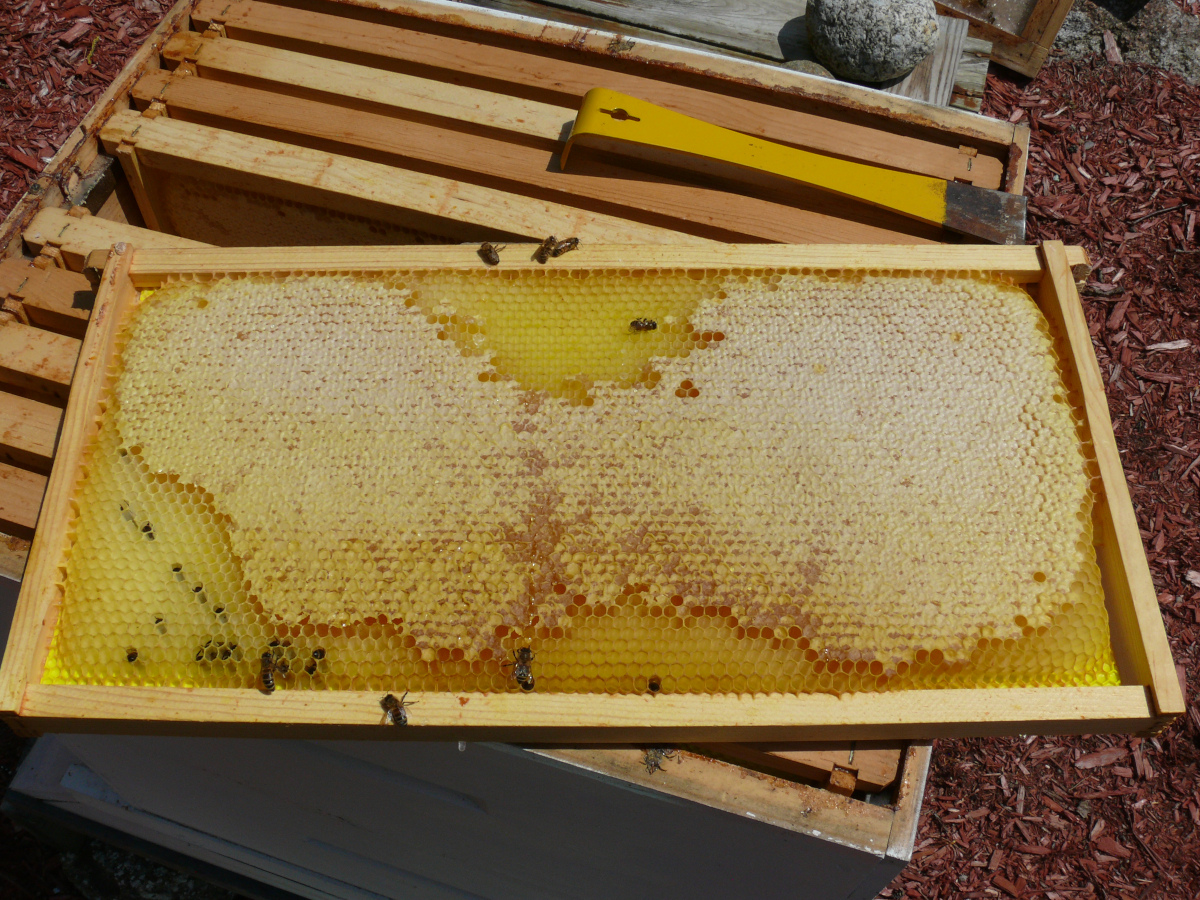
Bees
Unfortunately, the bee colony did not survive the winter.
A lot of colonies were lost this past winter. Donna's niece
lost all four of her colonies!
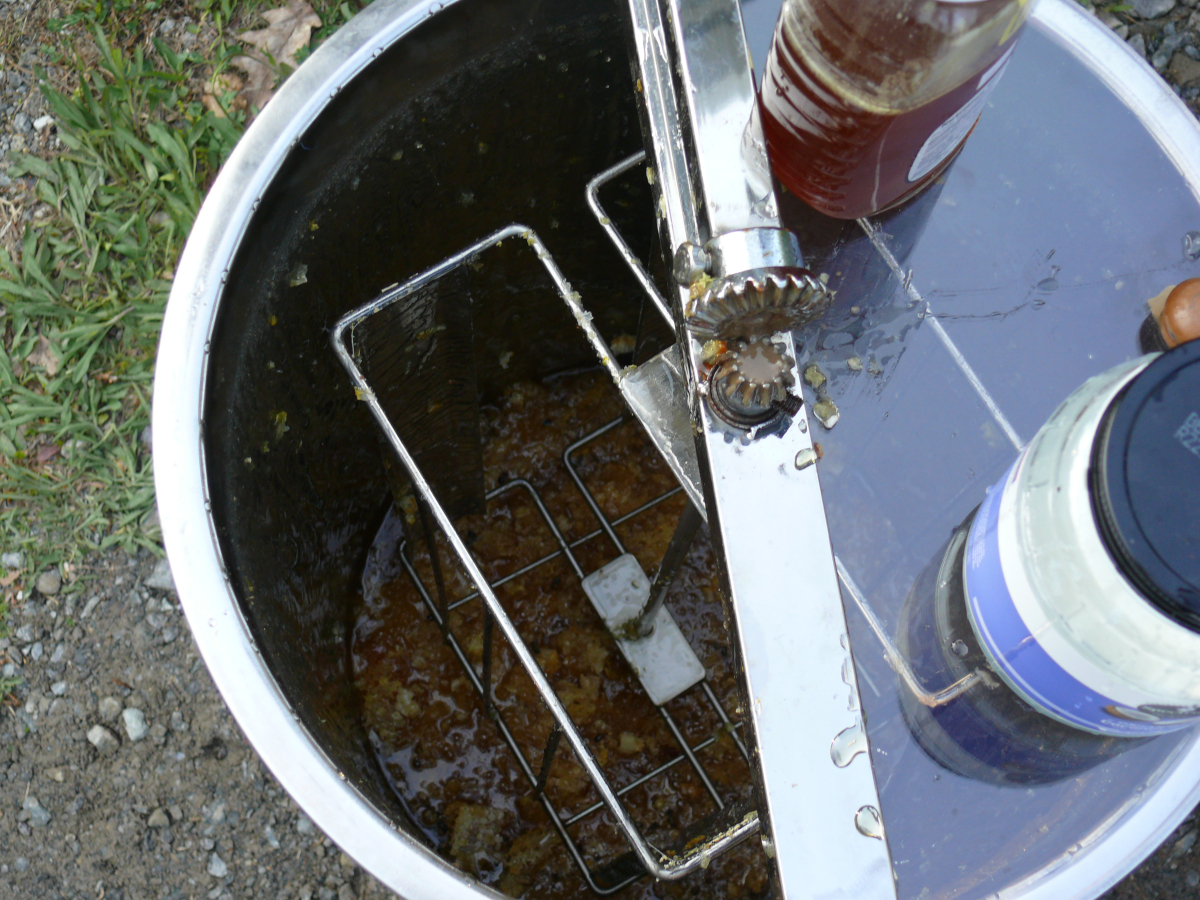
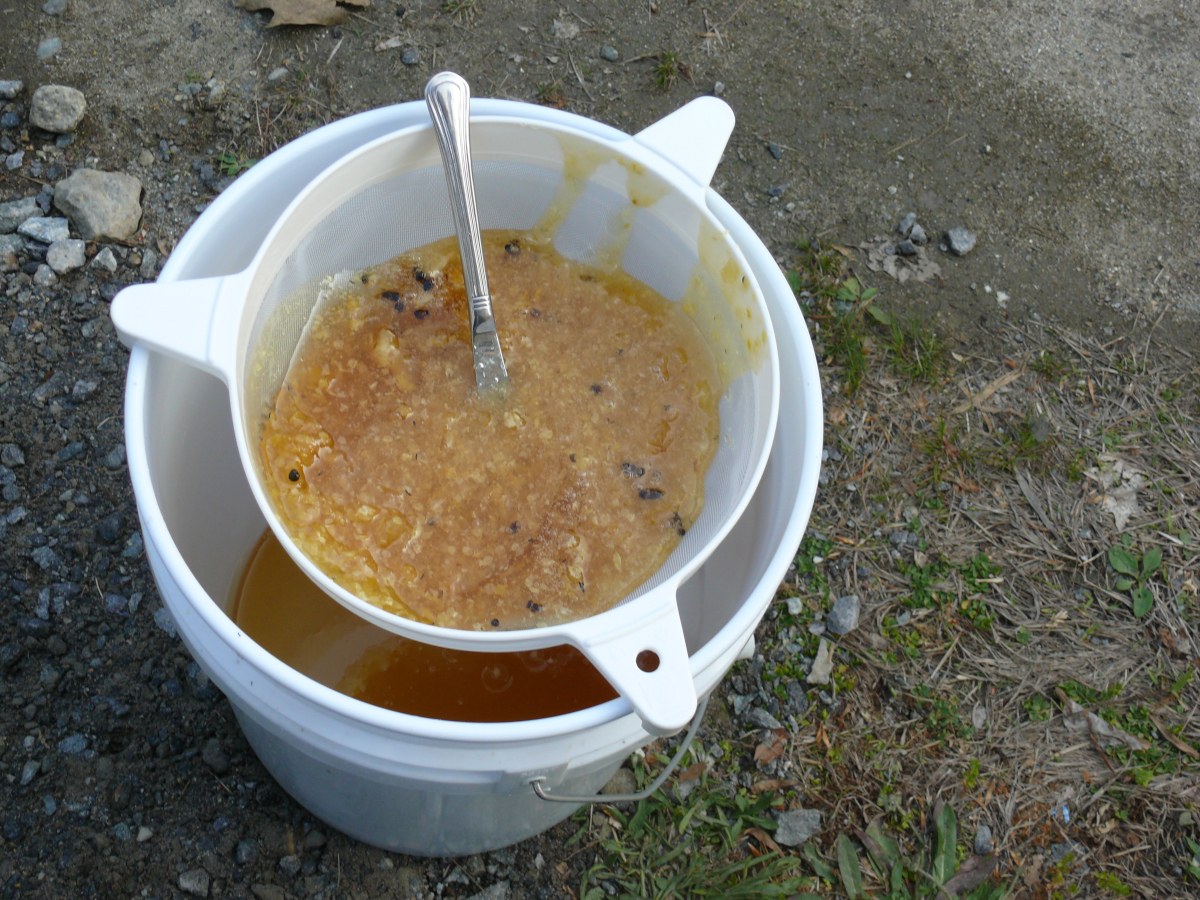
The failure did leave me with seven frames of capped
honey. They allowed me to learn how to extract honey
from frames. It's a sticky job, and the spin extractor is not
well designed. It cut me several times while cleaning it!
The covers had a tendency to fall into the drum. Once I
got used to it, it works well. Straining out the propolis
and wax (and dead bees) took several hours.
I have ten bottles of at least 2 lbs capacity. I'm watching
them for now, as there may be sugar mixed in with the
honey. If so, I believe that the sugar will ferment and
contaminate the honey in the jar.
Here are some shots:
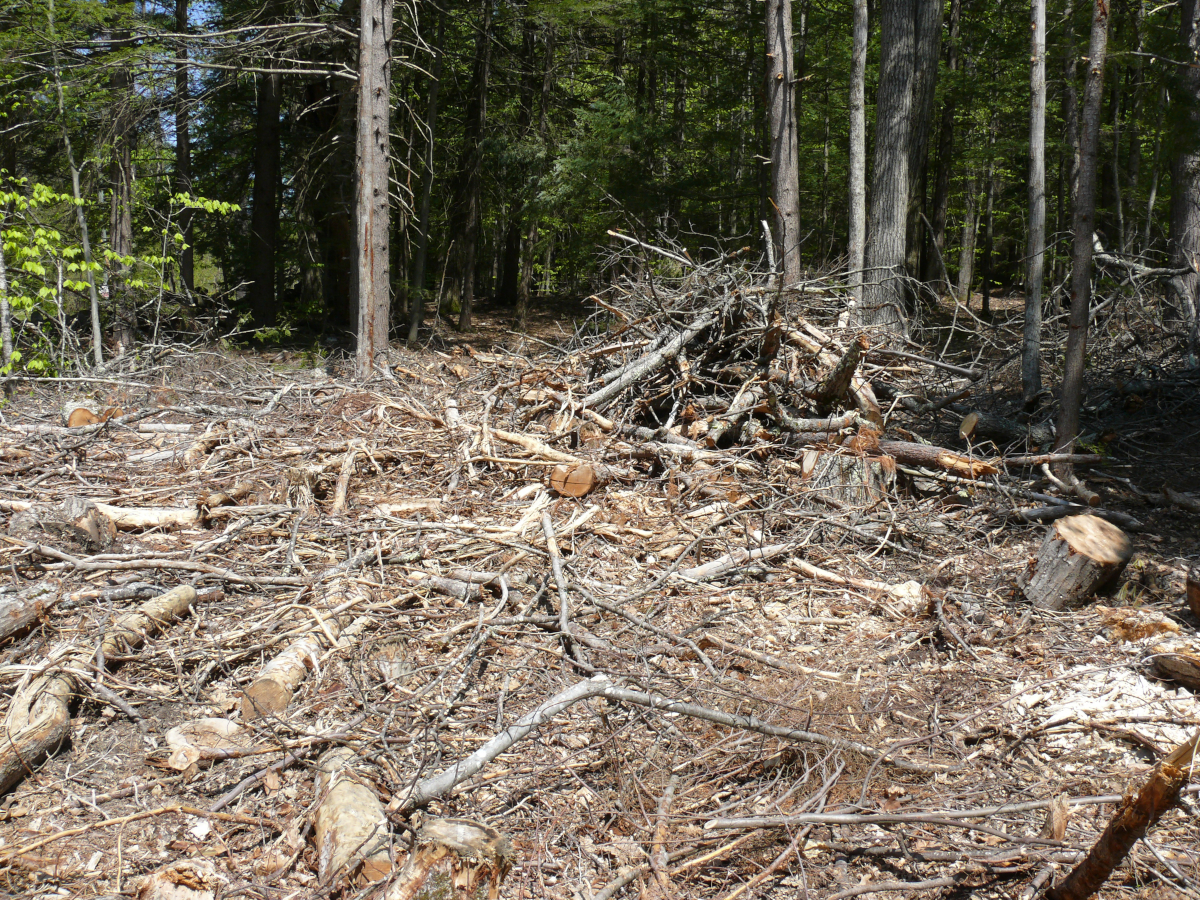
New Field!
Dave dropped about a dozen 100+-year-old oak trees
before I returned. Once I stack the brush and burn it
this winter, I'll have a field about 60 feet in diameter.
I have a persimmon seedling that I'll plant in the field with
some other plants and maybe another tree or two. Stay
tuned!
Here are some shots before I started clearing up:
Hops Ladder
I placed the hops ladder higher up the bull pine. Also,
I secured it better and with bungie cords. The heavy
snowfall did not knock it down, though. Take a look
here. It looks like
this
last year.
Thoughts
I don't know why we're such a problem to this planet.
It could shrug by allowing Yellowstone to erupt, and
we'd be gone. Maybe the planet enjoys our large
vehicles burning gasoline and diesel, because it ends
the lingering ice age?
It's great to be back home. A lot of work but
worth it!
Site Updates
I've added six films & one TV program to the
GRS database.
Enjoy!
New Trip Page!
Life is so easy, if not friendly, in central Arizona that we've
accomplished yet another day trip! It marks an important
and well-earned triumph for Mike. It's listed at the top of
the main trip page.
The mobile page is
here.
Enjoy!
Heading Back East Soon
I'll be hitting road again soon. While I regret leaving Mike,
I know that he will continue living the good life that we
experienced this winter. I won't ever forget the
good times!
However, I need to be back on-site to address all the challenges
that I've accepted. I'm very fortunate that I have a kind neighbor
who questions and asks to do tasks for me in my absence.
Something as removing flower buds from my young fruit trees
is impossible for me, despite being trivial. But James will kindly
do the job for me. I guess it's as
trivial as clearing his driveway of snow while he's at work. To me, it's
just something that neighbors do. That's why James is so great:
he thinks like me!
With James monitoring my lot, I know that I can resume my trip.
It will be part two following
Part One!
It promises to be awesome. I'll traverse States that I have never
seen. I'll be able to show why America is the pinnacle of the
Western Civilization! Stay tuned!
New Trip Page!
I've uploaded a new trip page. It's listed at the top of
the main trip page.
The mobile page is
here.
Enjoy!
Day Trip: Hassayampa River to Vulture Mine Road
Mike wanted to show me the Hassayampa River near Morristown.
We followed Gate Road to where it runs beside the river. Since the
river is a popular four-wheeling spot, the authorities had roped off
the usual entrance with red flags.
We drove around them as others had done before us.
The river was higher than Mike recalled, which comfirms my
suspicion that this winter was wetter than usual for the area. It's
difficult to determine the depth of
the river from the edge.
So Mike waded in...
with the Jeep.
The water looks to be about a foot deep, which is considerably
more than a trace of water with mud!
On the other side is a gate that leads into the OHV area. At first
we thought that the gate was locked. Fortunately, the new padlock
was put there to provide the illusion of being secured. Take
a look.
Arizona Fish & Game has done an excellent job
labeling the trails.
We followed 9054 through the area. While not a difficult drive, it
was a pretty one. The wildflowers were in full bloom. See them
here,
here,
&
here.
We saw forests, which may sound odd for desert. See if you agree
by clicking
here,
&
here.
Then, we came across
something very unusual.
Not to sound morbid; however, this collapsed saguaro looks like
a man who was shot in the head while trying to surrender. Hmm,
the work of a Mexican cartel?
On the other side of a "private" gate, we found a bunch of dirt
roads laid out in a grid. It's as if a land developer intented to
build houses but stopped before sealing the roads. A number
of people lived in camps along these roads. One property
owner was especially direct with his message. See it
here.
The dirt road led us to Vulture Mine Road near
Vulture City.
This ghost town rapidly grew around the profitable
gold mine.
Here's a warning
from one of the AZ F&G route signs. Also, before we entered
Wickenburg, we passed
this impressive antenna.
Site Updates
I've added one film & one TV program to the
GRS database.
Enjoy!
Aston Martin Vantage
Having rented the magnificent
Audi R8,
we decided to try another car in the same class from
Enterprise's Exotics Collection. We both expected the Aston
Martin Vantage to be a touch slower and much more luxurious than
the R8. Boy, were we wrong!
The cardboard-grey Vantage coupé looks the part.
The
sweeping body and overly-styled wheels
immediately
draw one's attention. That is the gist of the Vantage. Stylish
details thrown together on a car. And I mean "a car", as this
vehicle is not meant to be driven. The first, and really only,
purpose of this vehicle is to be a garage queen. Aston Martin
reinforces this opinion by supplying the car with a battery
tender!
With this concept in mind, I'll continue to describe the style
and then report the function because the Vantage
is definitely an example of style before function. I did like the
taillamps.
They're clever and perhaps the best part of the vehicle! You'll
probably notice that the trunk lid is popped in that photo. That's
because it's not easy to close anything on the car except the fuel
filler flap!
After one pushes the end of the flush door handle--don't
ask which end because I don't care to remember!--to present a
stalk to pull open the door, the door swings up slightly to avoid
curbs. Neat but that's something you design after you make the
door close! We found it better to slam doors to ensure closure.
The interior is not a nice place to be. The seats may be well-adorned
with the two words that are the only reason to buy this car,
but they are really thin pieces of plywood covered in rather
poor-quality leather. They have even less
padding than R8 seats, which are plenty firm. Imagine sitting
in an economy car seat that has been used by a grossly obese
individual for one-hundred thousand miles. Aston Martin just
saved us the time by skipping the padding!
The
center console
looks like an accountant designed it. Nothing is where
you would expect it, so it's good that they labeled everything.
The prime real estate below the start button is empty in this
model. We've seen videos where there is something there.
The only good thing about this mess of buttons is the dual-zone
climate control system. It works well, despite being slow to
respond to input from the occupants. It seemed to me that
the car has to ensure that the committee agrees with your
decision to turn up the fan. The engine also seems under control
of the committee.
The styling starts to fail when one looks at that the
front end.
It has the massive grille in keeping with the modern "way",
which Randy remarked about when we attended the Buffalo
Auto Show. But that's really the best part of the frontal view.
The absolutely massive hood reminds me of the BMW Z-slug--that's
a Z4--because the headlamps are relatively small. As Mike reminded
me, the hood needs to house the V12. So why not do the true
English thing and only offer the V12, instead of the
twin-turbocharged V8?
I've struggled long enough to write kind words about this
thing. It's time to be honest. The Vantage rides worse than
a certain lifted Jeep with massive tires.
I am completely serious. Riding in the Vantage is like being in a
rollercoaster that's gone off the tracks. If you run over pebbles,
you hear them bouncing off the undercarriage. If you manage to
find a rough patch of road in central Arizona, then the car rattles
and bounces. There were even a couple of interior rattles that
were exceptionally annoying to the passenger!
Full-throttle starts are particularly unnerving as a passenger.
It felt like the car could veer off at any moment and find that
one tree that's large enough to kill us! It reminded me of the stories that
I heard of '80s supercars. However, that was 40 years ago...
There was also a periodic misfire, and Mike reported a misfire when
he started the engine the next morning. It occurred despite storing the
car in a garage in greater Phoenix in late March. That reminds
me of the stickshift 2012 Dodge Dart that bucked and stumbled
when I test drove it. It is not 1983 where that type of performance
was acceptable!
The engine really was the best part of the drivetrain. Maybe that's
because it is produced by AMG? The
control system of the transmission was definitely demented. It tried to
combat the very noticable turbo lag by cutting the delivery of power.
Yeah, that's a safe thing to do
Oh, and I can't forget to report that the Vantage intentionally
backfires when one lets off the throttle. Fortunately, it only
happens in track mode but why would a fast luxury car
do such a thing? It seems to me to be a very un-British behavior.
Other problems with the car... The driver's seat can be easily
pushed back. That's a safety "feature" because who knows if a
spear is loaded into
the massive hub of the steering wheel
instead of an airbag!
Also, there's no glove box. I think the accountants had a say in
abolishing this very useful compartment.
Have I reported that
the ride is terrible? Being dragged by a horse through a forest
would be more pleasant. The fact that the car didn't track straight
bothered us. Both of our cars are easier to drive. Driving the
Vantage was like driving a beat-up pick-up truck with a huge engine.
I rode shotgun a lot in this car because I really didn't like
driving it. I wonder if it had been crashed at one point. That would
explain why the tire-pressure monitoring system reported that
both front tires were low after only 50 miles of driving!
Also, various
switches didn't work well. The trunk release button had to be
mashed to operate. Everything seemed to be in a state of decay.
I don't know about you, but I would never tolerate so many faults
from a vehicle built in 2022 with a bit more than four thousand
miles on the odometer.
There are some up sides. We enjoyed
cool views of Roosevelt Lake.
We also
learned that when one shells out $130,000 or more for this vehicle,
the best part is
this.
Oh, and also we have the privilege to comment that "my car rides
better than a Vantage". In fact, all of our cars do almost everything
better than a "Crappage"!
Wet
This winter seems wetter than usual for greater Phoenix.
It's nothing like the rain that California has been experiencing,
thankfully! I wonder if the extra rain will slow the declining
water level in Lake Mead? I'm pretty sure it won't reverse it!
Site Updates
I added some "mouseovers" & standardized the look of the
pages in the
GRS database
a little more. These are just details, but they add pleasant touches.
Additionally, I've added three films & one TV program,
including a new favorite. Enjoy!
Site Updates
I've added five films to the
GRS database.
Also, I added a new day trip to the
Trips Page.
Enjoy!
Saturday, 18th of February
Day Trip!
I added a day trip to the
Trips Page.
Enjoy!
Saturday, 4th of February
Day Trips & Mazda
Mike and I have some day trips planned for the near
future. I'll post photos as we make the trips!
The few miles that I've put on the Mazda since the
installation of the oil pressure gauge suggest that
the heavier grade oil solved the pressure problem.
The lowest pressure that I have seen is 17 psi. The
ultimate test will be when I return home with a loaded
car!
In the Spring
I've completed a DIY improvement that'll make my
lot even more distinctive. I'll post photos and
maybe a video once I install it. Stay tuned!
Site Updates
I've added three films & one TV program to the
GRS database.
This set includes a new favorite.
Enjoy!
Rain In the Desert
It has been cloudy and raining in the Valley of the Sun.
Surprised? (Pardon the pun!) Most deserts receive rain.
It's just not as often as we are accustomed!
The rains have brought back a lot of green. That coupled
with the very blue sky sets off the browns and yellows in
a rather beautiful way. One just needs to ignore the angry
and impatient locals honking at one another!
Films
I haven't been watching as many films as usual.
Mike and I have been re-watching the first season of
Star Trek: The Next Generation.
It's a great show!
Cellar
I'll resume my reviews in the spring when I return to finish
building my cellar. Speaking of it, I have designed a
reinforced concrete roof. The beauty of such a roof
is that it is long-lasting and may be covered with soil. I even
designed it so a vehicle could drive on it. Not that I would do
so!
Under Pressure?
The Mazda developed a fault during my trip. The oil pressure
light would illuminate when I stopped. The light would go
out if I revved the engine to 1,500 RPM or so. I determined
that the oil thinned such that the pressure dropped
below a certain value, triggering the "idiot" light. Extended
driving on the Interstate obviously would thin the oil the
most, which is what I did to expedite my journey west. Hence
the problem.
My solution wasn't brilliant, but it worked. Keep the engine speed
above 1,500 RPM. On the highway, that is simple to do.
In the traffic
through the cities, I had to be creative with choice of gear.
When
I stopped for the night, it was the most difficult. I had
to keep up the engine speed and search for a motel in the
darkness after thirteen hours of driving. It paid off because the
engine is no worse for the wear, and I reached my destination.
Why is the light coming on now and not before now? It's rather
simple. Something in the engine oiling system is wearing. The
gaps are larger than spec., and the oil pump cannot maintain
pressure with the thickness of oil. The most logical culprit is
the main crankshaft bearings, since they consume the most
oil.
Mike and I have since increased the oil viscosity from 0-20 to
a more reasonable 5-30. The Factory Service Manual states
that the oil grade should be anywhere between 5-30 and
20-50, depending on where you live. 0-20 is relegated only to
North America.
A change in viscosity--0-20 to 5-30--will increase the thickness
of the static oil film, which
will reduce the "gap". Practically, I'll increase the viscosity
as the engine ages. I can go to 20-50 without violating the
Mazda specification.
Wouldn't it be fun to start the engine with 20-50 on a -10
degree morning?
It's a good thing that I currently work from home! Of course,
this engine is computer-controlled and fuel-injected.
With 173K on the odometer, I figured that I needed another
solution that would provide immediate results. Why not
install an oil pressure gauge? That's exactly what we did!
Once I located a red LED gauge, the fun began. Where should
we fit it? Attach it to the A-pillar and look like the poor-child
in
The Fast and Furious?
Mount it on top of the dashboard?
That's OK on an angular dashboard. Not so attractive on a
CAD-shaped dash. What about in the face of the dash? Neither of
us want to drill into a modern dashboard.
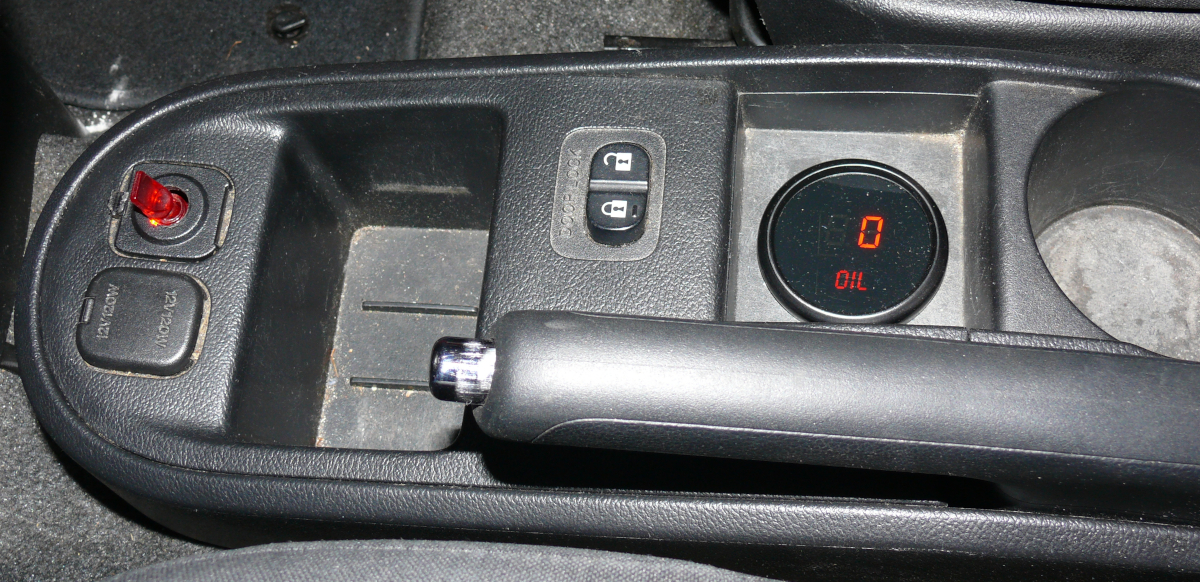
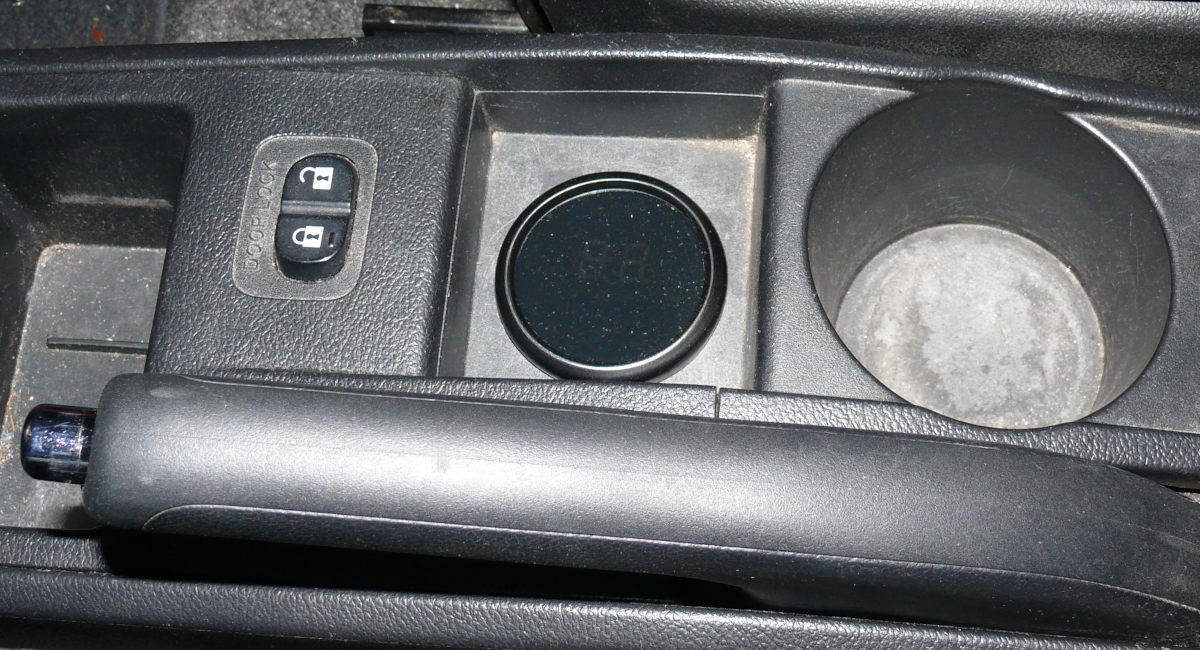
The best placement was in a square pocket in the center console.
I use it only to collect coins, as nothing else seems to fit there.
It's also conveniently located adjacent to the central locking
door switch, with plenty of clearance underneath.
Speaking of switches, wouldn't it be great to have the capability
to turn off the gauge when it's not wanted? Well, I replaced the
radio last year. (The original unit had packed up.) The replacement
meant that
I had to abandon the remote 1/8" AUX jack. It resided behind
a cover that is also located in the center console. Guess what
we did? Or you can just take a look:
It looks pretty good in the light or darkness. Thanks, Mike,
for the lighted switch! (It is only illuminated when switched
"on".) The gauge isn't obvious when the car is parked.
In fact, it looks like some funky, plastic item that's simply
sitting in the center console.
|